

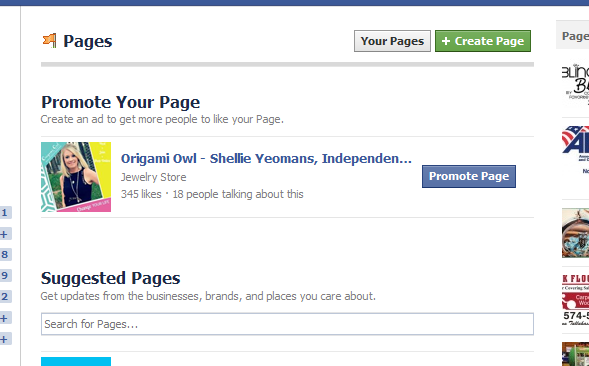
1. Go to https://www.facebook.com/pages/create.php.
a. Once the page is up, click the green CREATE A PAGE button at the top.
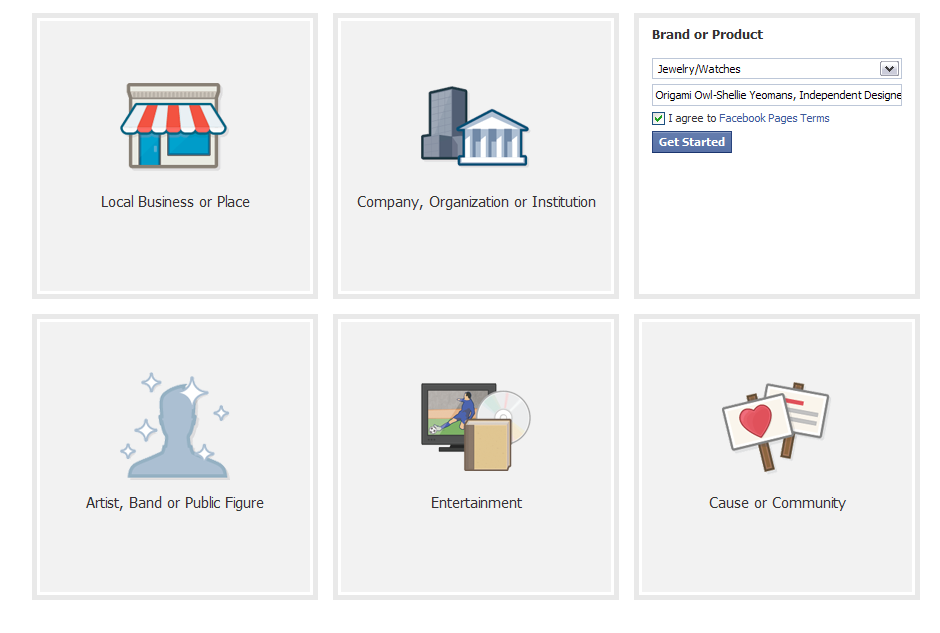
2. Next, you’ll see choice boxes, instructing you to choose what your business is. There are a couple
ways of doing this. Most of the time you will choose a brand or product. I also like to use the Local Business category. The reason is if you are willing to put in your home address, your business will be able to be searched on Google. For this set up we are going to Choose “Brand or Product” 
3. Choose “Jewelry/Watches” and type in the name you want for your page, making sure it complies with any guidelines provided by O2.
4. ABOUT: Next, you are going to type in your Fan page name under the drop down box. I urge you to read Facebook’s Terms of Service and then check the box stating you agree. You will also want to read Origami Owl’s policies for Social Media names. They make is clear what they allow for Fan page names.
For example, mine is www.Facebook.com/Locketsbyshellie
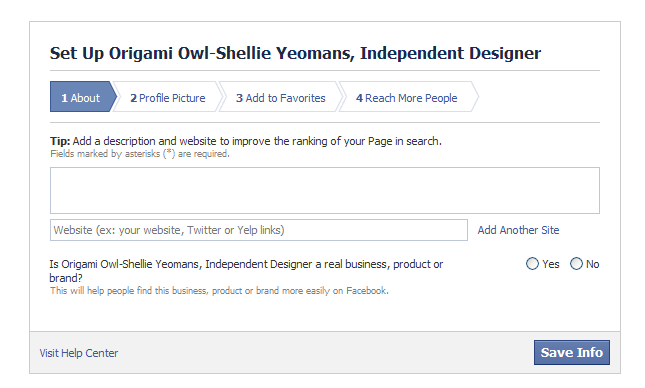
5. Facebook will then ask you to fill out some information about your new Origami Owl business. Follow each of the steps that it asks. For the two Yes or No questions, be sure to click next and then save your info.
6. Upload a profile picture (perhaps a recent headshot or a picture of you doing something that relates to your Origami Owl business, I would not recommend a logo because you cannot build a connection with a logo).
7. Next you will notice that Facebook will add your new Fan page to your favorites list. This will make it much easier for you to locate and access daily.

8. Now you can add a cover photo. The Back office has some new great options to choose from.
9. Your Facebook Fan page is now created. Now you will need to update your page info.
10. Be sure to update your page info. This means telling your fans all about you in the ABOUT section. Be sure to use keywords as well as your website address in the about section. Fill out the About section completely. Let people get to know you.
Be sure to look at the small area section of the admin panel. This section allows you to claim a custom URL for your page. That means that instead of something like
http://www.facebook.com/pages/your-site-name12345678901 , you can choose something that people will remember such as www.Facebook.com/locketsbyshellie
Be careful when setting your username—it can only be changed once!
11. Invite your friends (especially your customers) to “Like” your page.
12. Enter your Origami Owl business website address and explain what people can expect by liking your page. Like special discounts, giveaways, notice on the latest Origami Owl product lines, etc.
13. Double check under “Your Settings” that the box is checked to get email notifications whenever someone comments on your page or messages you (even so, it’s a good idea to check your page frequently to see if someone has contacted you with a question—you don’t want to miss customer inquiries via Facebook!).
14. Be sure to save any changes.
Now you are ready to post away and share your Origami Owl Business with the world. You should be posting 3-4 times per day with a variety of information in regards to Origami Owl, humor, tips and personal stuff about you.
How do I promote my page?
· Put your Facebook page URL in your email signature (along with your personal company site URL).
· Make your Facebook page your “employer” on your personal Facebook profile.
· Invite your friends to like your page: click “Build Audience”, “Invite Friends” in the Admin Panel of your page (be careful with “Invite Email Contacts”—it usually ends up turning into a friend request to each person you invite to your page!).
3. Choose “Jewelry/Watches” and type in the name you want for your page, making sure it complies with any guidelines provided by O2.
4. ABOUT: Next, you are going to type in your Fan page name under the drop down box. I urge you to read Facebook’s Terms of Service and then check the box stating you agree. You will also want to read Origami Owl’s policies for Social Media names. They make is clear what they allow for Fan page names.
For example, mine is www.Facebook.com/Locketsbyshellie
5. Facebook will then ask you to fill out some information about your new Origami Owl business. Follow each of the steps that it asks. For the two Yes or No questions, be sure to click next and then save your info.
6. Upload a profile picture (perhaps a recent headshot or a picture of you doing something that relates to your Origami Owl business, I would not recommend a logo because you cannot build a connection with a logo).
7. Next you will notice that Facebook will add your new Fan page to your favorites list. This will make it much easier for you to locate and access daily.
8. Now you can add a cover photo. The Back office has some new great options to choose from.
9. Your Facebook Fan page is now created. Now you will need to update your page info.
10. Be sure to update your page info. This means telling your fans all about you in the ABOUT section. Be sure to use keywords as well as your website address in the about section. Fill out the About section completely. Let people get to know you.
Be sure to look at the small area section of the admin panel. This section allows you to claim a custom URL for your page. That means that instead of something like
http://www.facebook.com/pages/your-site-name12345678901 , you can choose something that people will remember such as www.Facebook.com/locketsbyshellie
Be careful when setting your username—it can only be changed once!
11. Invite your friends (especially your customers) to “Like” your page.
12. Enter your Origami Owl business website address and explain what people can expect by liking your page. Like special discounts, giveaways, notice on the latest Origami Owl product lines, etc.
13. Double check under “Your Settings” that the box is checked to get email notifications whenever someone comments on your page or messages you (even so, it’s a good idea to check your page frequently to see if someone has contacted you with a question—you don’t want to miss customer inquiries via Facebook!).
14. Be sure to save any changes.
Now you are ready to post away and share your Origami Owl Business with the world. You should be posting 3-4 times per day with a variety of information in regards to Origami Owl, humor, tips and personal stuff about you.
How do I promote my page?
· Put your Facebook page URL in your email signature (along with your personal company site URL).
· Make your Facebook page your “employer” on your personal Facebook profile.
· Invite your friends to like your page: click “Build Audience”, “Invite Friends” in the Admin Panel of your page (be careful with “Invite Email Contacts”—it usually ends up turning into a friend request to each person you invite to your page!).
*Don’t spam your friends with invites. Invite them to like your page once, then invite only new friends after that.
What do I post on my page?
Get started by “sharing” pictures of your locket and telling your story.
1. Click “Share” under the status you want to share:
2. Choose to share “On your Page”, write any introduction you’d like to the status/link, and click “Share Status”:
3. You can use your page to update your customers about sales, specials, upcoming events, and new products, as well as share tips, ideas, and pertinent links.
4. Sharing photos is often the best way to get “likes” and comments. Use the photo caption area to include links to applicable products/specials.
5. Make sure to share product links that direct customers to your replicated website. i.e. Shellie.OrigmiOwl.com. If the Nest posts something about a new product or Image on their Facebook page, you can copy what they wrote, but replace their link with the direct link to the product’s page on your own consultant site:
Should I “Like” other pages from my page?
Yes! Your page can “like” other pages by clicking “Add to My Page’s Favorites” in the page’s sidebar. This is a great way to give your customers easy access to the other pages pertinent to your business. You can even select which ones will always be featured there by selecting the “Featured” option when editing your page’s info.
How often should I post on my Facebook page?
The biggest rule of thumb to remember is not to spam your page’s “fans.” Posting several times a day is okay, but spread it out! Sharing too many links/updates at once is a quick way to get your page unliked. Take advantage of the scheduling feature so that you can compose your posts in one chunk of time but spread out their posting schedule.
Should I ask my customers to post on my Facebook page?
It’s up to the permissions you set, but you can invite customers to post pictures of their lockets created with your products on your Facebook page.
What if my customers want to help me promote my Facebook page?
The best way they can help promote your business via your page is to invite their friends to like your page (by sharing it on their wall), and then by “liking” your posts. The more your fans like your posts, the more Facebook displays your posts to your fans.
Should I create Facebook events for my business events?
It can be a good way to generate interest and collect RSVP’s. If you do create Facebook invites for your Origami Owl events, make sure to keep your customers’ privacy as your main concern: make it a friends-only event so that customers can still invite friends but the general public can’t see that they are gone from home at that time for that event.
***Please note that it is against Origami Owl Policies to create paid Facebook ads for your business...so skip that portion of the Facebook sign up process.
0 comments:
Post a Comment
Note: Only a member of this blog may post a comment.